Setting Test Options
In this tutorial you will learn how to choose test options.
After creating your test, you need to deploy it so that your students can access it. The information on this page helps you understand each of the options and our recommendations so that you can make appropriate choices for each of the settings.
- If you created your test in the Course Management > Course Tools > Tests, Surveys and Pools > Tests, go to a content page such as Assignments in your course. Click Assessments > Test. In the "Add Test" section, pick the test you want to deploy and click Submit.
- If you have a test already listed on a content page such as Assignments, or Exams, but is not available to students, click the down arrow on the right of the test name and select "Edit the Test Options."
Recommended settings
Recommended settings specifically for reducing cheating and student frustration during tests
To reduce cheating in online tests/exams
- In the section on "Show test results and feedback to students" (you need to scroll down to see it), for "After Submission," do not check any of the boxes.
- In the section on "Test presentations" (you need to scroll all the way down to see it), check the "One at a Time" radio button as well as the checkboxes for "Prohibit Backtracking" and "Randomize Questions."
To reduce the frustration of students when their Wifi was disconnected for a few seconds during a test
- Do not check "Force Completion" box, enable Timer and turn Auto-Submit on.
- Tell students not to use phones to take the test. Use Chrome or FireFox browser to take the test.
More detailed information for all setting options and our recommendations can be found below.
Test Options
The explanations below for all settings follow the sequence of Bb "Edit Test Options" page. If you are just interested in a specific setting, scroll down to view.
Open test in new window:
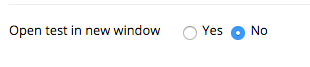
- Yes - it means that the test page will open in a new browser window or tab other than the tab or window of your course page. During a test students can switch back and forth between the test page and your course page.
- No - it means that the test page will open within your course page.
Which one to choose? The answer is that it doesn't matter. Students can always open another browser window on the same computer screen or another device to access your course page unless a browser lock down tool is used.
Test Availability:
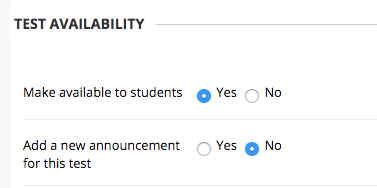
- Make available to students - check Yes if you want students to take it in the semester. Use "Display After" and "Display Until" on the page below to restrict the time when students can access it.
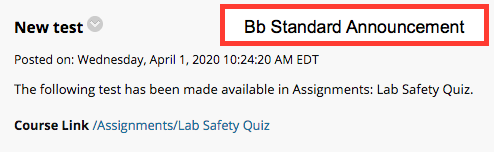
- Add a new announcement for this test - a sample of a Bb standard announcement is shown below. If the test is not available to students, the announcement will not be posted. The recommendation is to check "No" for this option and send your own announcement at an appropriate time to students.
Multiple Attempts
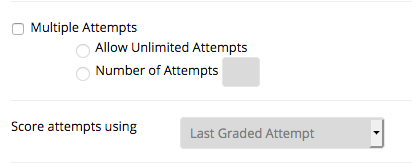
- If it is a high stake test, do not allow multiple attempts.
- If it is a low-stake test, you can check the check box for "Multiple Attempts," then select the radio button for "Number of Attempts" and fill in the number of attempts.
- If it is for students to practice, you can allow them unlimited attempts.
When allowing for multiple attempts, you can choose which attempt score is used for the grade of the test. Click the drop-down box for "Score attempts using" and select one among "Last graded attempt," "Highest grade," "Lowest grade," "First graded attempt" and "Average of graded attempts."
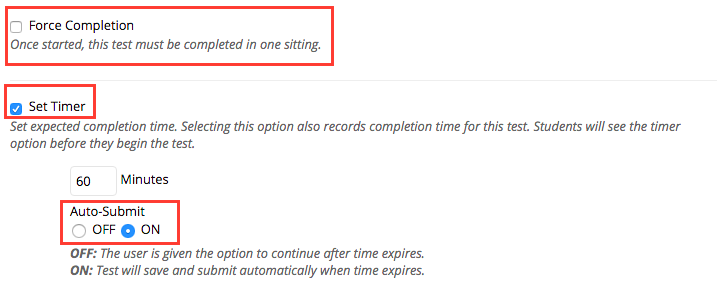
Force Completion and Timer
- Force Completion - We recommend that you do not check "Force Completion." Many students use wifi which can have a few seconds or longer disconnection. When it happens while students are taking a test, their sessions are interrupted. If you force completion, Bb will not allow students to come back to the exam after the wifi is back. Students have to contact you asking you to clear their attempt so that they can get in the test and re-take it. Not forcing completion doesn't give students more time for the test. If a student's Bb is disconnected for a few seconds or minutes 15 min after they start the test, the timer will continue. When they come back 1 min after they are disconnected, the timer will be at 16 min. All their answers to previous questions are saved and they can continue the test and the timer will continue.
- Set Timer - If it is a timed test, we recommend that you turn Auto-Submit ON so that Bb will submit the test when the time is over automatically and all students have equal time for the test.
Set up the time interval when students can access the test
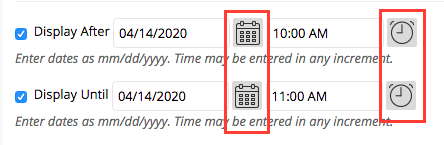
Check the checkboxes for "Display After" and "Display Until" then click each of the calendar icons to set dates and clock icons to set time. Note: the "Display After" and "Display Until" times are when the link to the test is available to students. It doesn't mean that the students cannot continue the test after the "Display Until" time is over. As long as the students are in the test, they can continue until the time they spend exceeds the Timer defined time.
Password
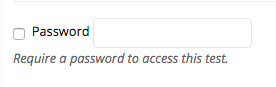
Password is case sensitive. The recommendation is not to add a password. It just adds one more unnecessary hurdle to students.
Test Availability Exceptions
This is used to give some student(s) extra time or/and a different test day.
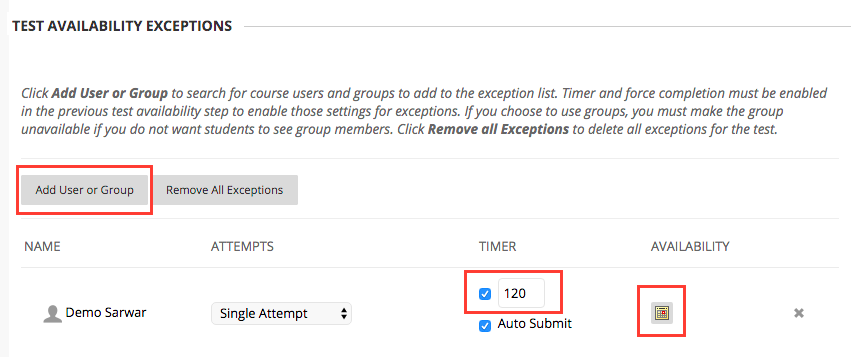
- Click the "Add User or Group" button. A pop-up window appears with your student names. Check the check box(es) on the left of the student(s) for whom you want to give extra time or/and a different test day. Click Submit.
- In the box under Timer, modify the time.
- If you want to give a different day to take the test, click the calendar icon under Availability to select a different day and time interval.
- If you want to remove the exception from a student, click the "x" icon on the right for that student.
Due Date
The due date for a test is included in the course notifications which can remind students about the test.
Self-Assessment Options
- Leave the check mark for "Include this test in Grade Center score calculations" in case you want it to be part of the course grade. If you decide not to include it in the course grade later, you can simply not add it in the "Weighted Total" calculation.
- If you check the check box for "Hide results for this test completely from the instructor and the Grade Center," you will not be able to see students' scores for this test. Use this option if you want students to practice. Note: once you choose this option and at least one student has completed the test, you cannot change back to not hide results.
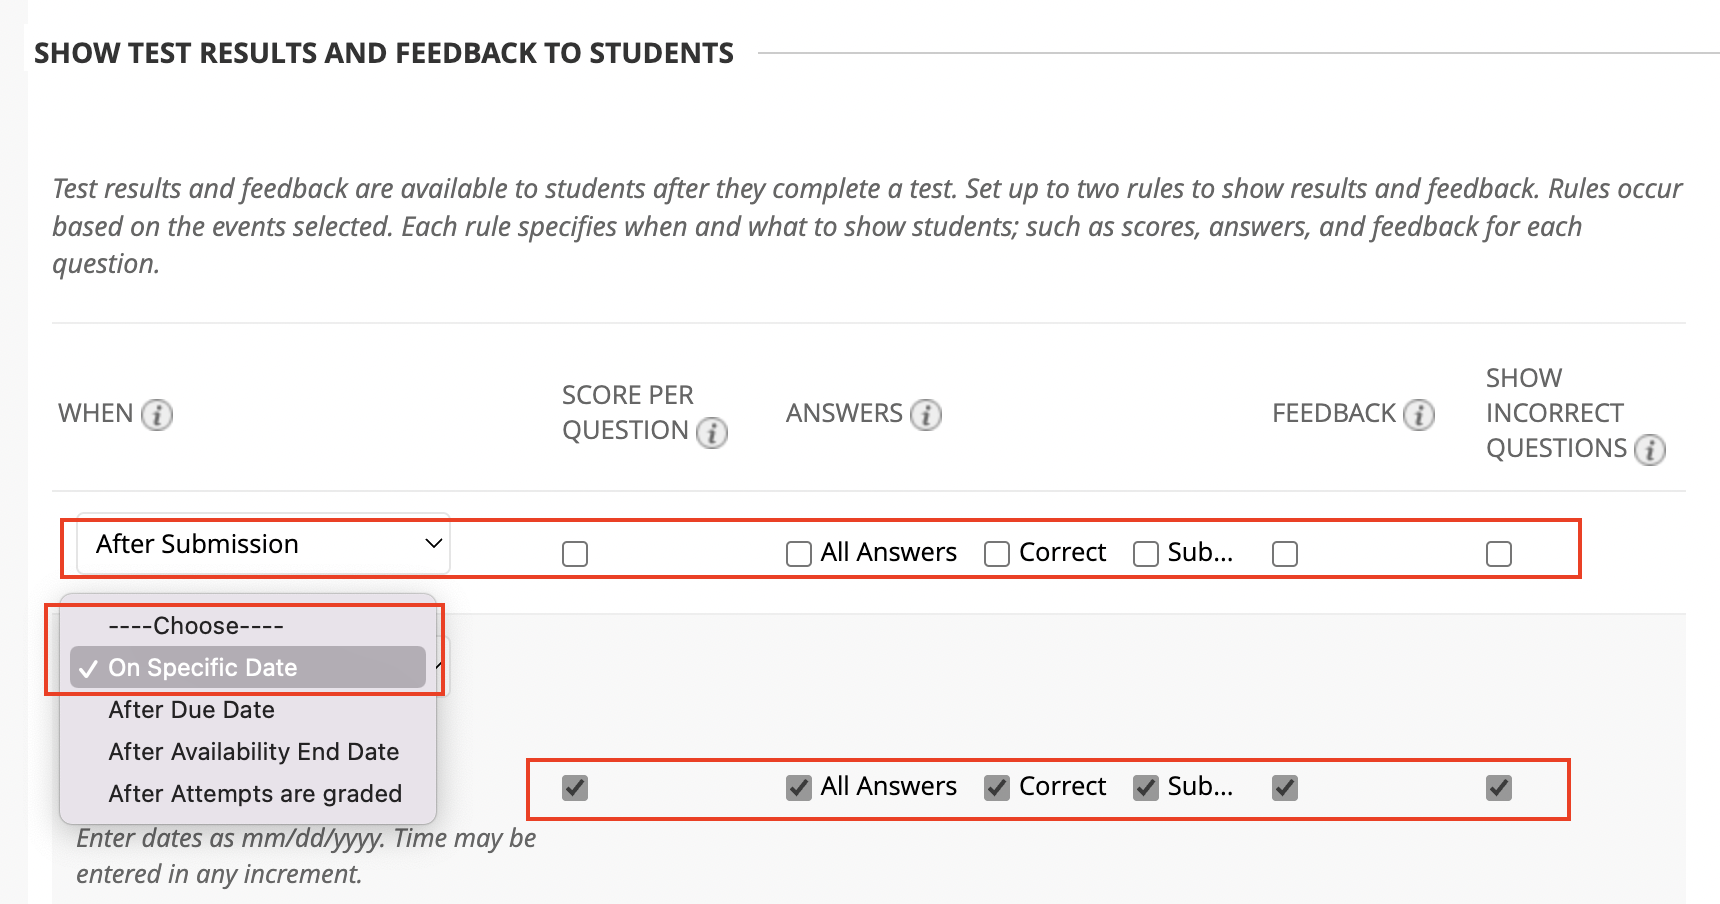
Show Test Results and Feedback to Students
On the left, under WHEN, you can choose two settings.
- One by default is "After Submission," e.g. immediately after students submit their tests. If all questions in the test can be graded by Bb, students will see their test score. Allowing students to see their scores for a test immediately after they submit it enables instant feedback. It can motivate students to study. If the test has short answer or essay questions that cannot be graded by Bb, students cannot see the test score anyway.
- If you check the check box under "Score per question," students will see all questions with their respective scores. This is not recommended if students don't take the test at the same time. Otherwise, the students taking the test at a latter time might get the test questions before they start from their classmates taking it at an earlier time.
- It is also recommended to not check the rest of the boxes immediately after the test submission if the test score is part of the course grade.
- For the second choice under WHEN, you can choose one from the drop down options. This setting provides opportunity for you to release questions, students submitted answers, correct answers and feedback if there is any, to students after all students submit the test.
- It is recommended selecting "On Specific Date" with which you can choose exact date and time when all students can see their test results, correct answers, etc. depending on which check boxes you check.
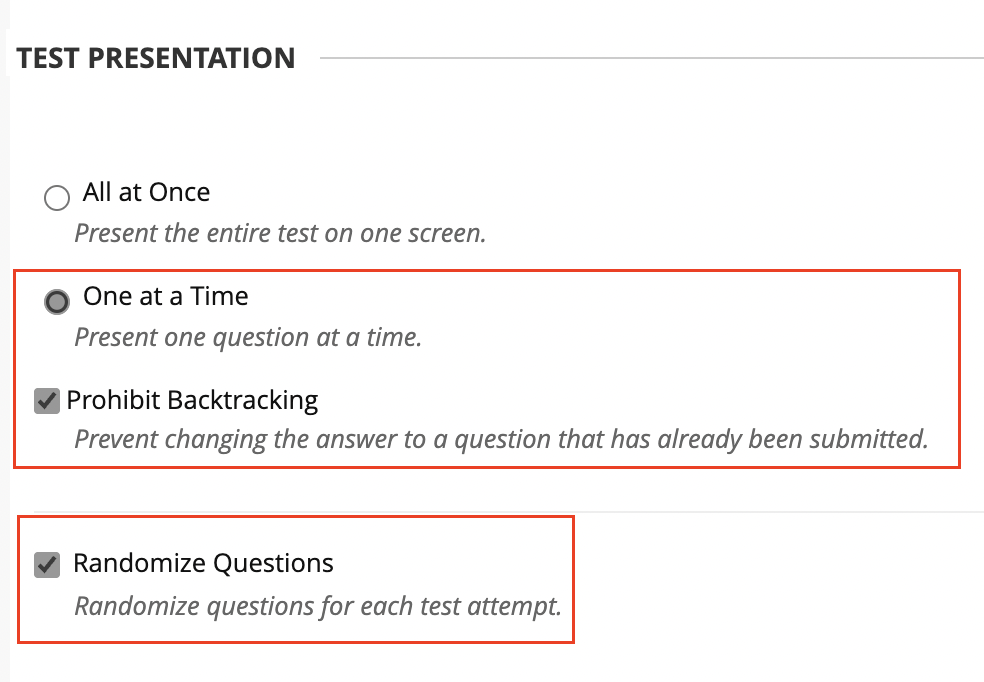
Test Presentation
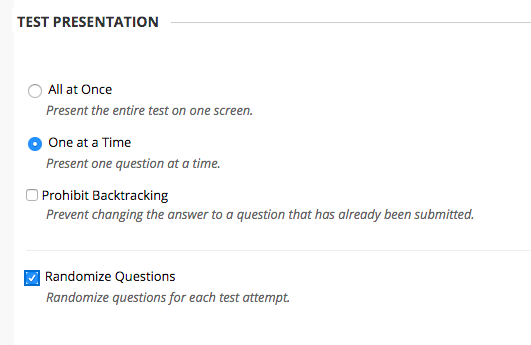
- It is recommended to choose "One at a Time." If you choose "All at Once," students will see all test questions on one screen/page. It makes it easier for them to take photos or screenshots and send them to peers.
- To reduce cheating, check the checkbox for "Prohibit Backtracking" so that students cannot go back to change their answers later.
- Check the check box for "Randomize Questions" to make it harder for students to discuss and compare answers to test questions among themselves.
Now click Submit to save your settings. Your test is ready to go.
Revised: June 20, 2023
York College / CUNY
94 - 20 Guy R. Brewer Blvd.
Jamaica, NY 11451
P: 718-262-2000