Using automatic closed captioning in live Zoom meetings
Steps to take to enable and use automatic closed captioning in live Zoom meetings
Log in to your CUNY Zoom account with your CUNY Login credentials.
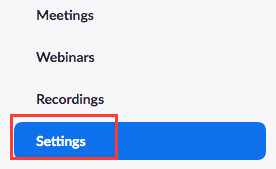
Click Settings on the left menu.

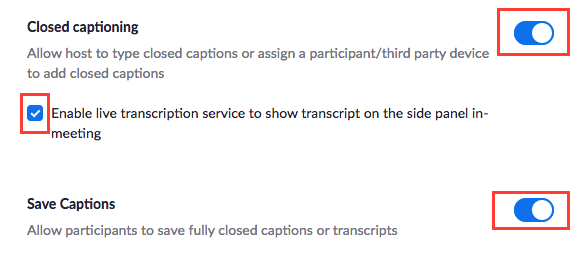
Scroll down to the section "In Meeting (Advance)." Turn the "Closed captioning" and "Save captions" on.
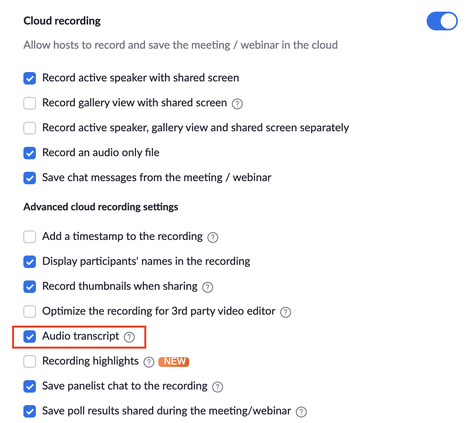
Scroll back up to the top and click the Recording tab.
On the Recording page, make sure to turn on "cloud recording." In addition, check the box for "audio transcript" which will make the audio transcript of your meeting included in the recording automatically.
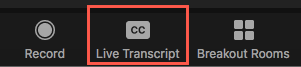
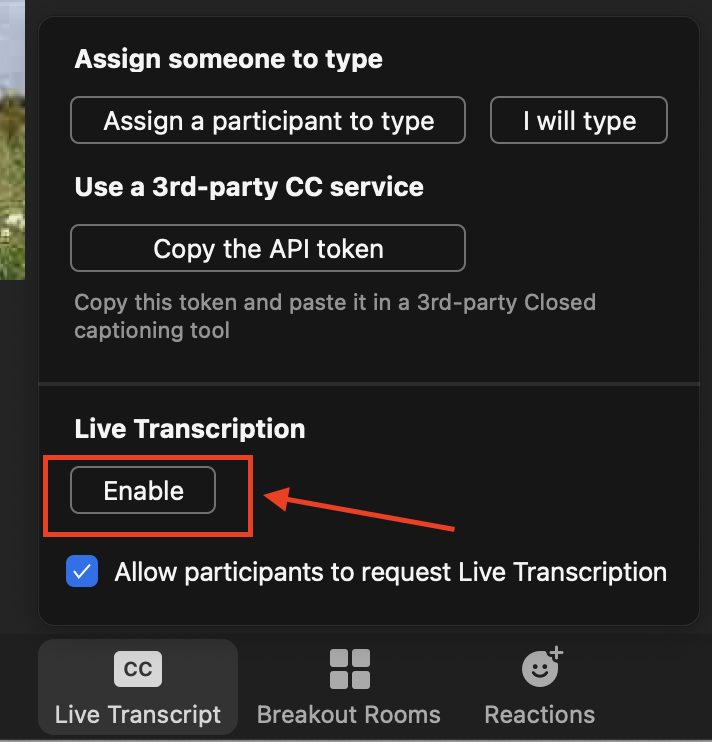
In your Zoom meeting session, at the bottom, click "CC/Live transcript."
On the pop-up box, click "Enable." Now your meeting participants/students will see the "CC/Live transcript" button appears on their Zoom meeting screen.
Tell the participants in your meeting that they can click the "CC/Live transcript" button on their Zoom meeting screen to see the closed captioning.
You and your students can save the transcript of your session by clicking the up arrow on the "CC/Live Transcript" button > "View Full Transcript." The transcript will appear on a panel on the right. Click "Save Transcript" at the bottom to save the transcript up to this point.
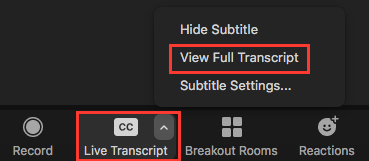
You and your students can also click the up arrow on the "CC/Live Transcript" button > "Subtitle Settings..." to change the font size of the closed captioning.
Note:
- The live "CC/Transcript" feature is not working in breakout rooms.
- It will take more time after your Zoom meeting to get the transcript in the recording. That is, you will receive an email with the link to view the recording first when the transcript is not ready. After some time, you will receive a second email when the transcript is available.
- You can review CUNY's article on Zoom Live Transcription for additional information.
Revised: October 30, 2024
York College / CUNY
94 - 20 Guy R. Brewer Blvd.
Jamaica, NY 11451
P: 718-262-2000